Are you tired of the buffering videos and annoying dead spots in your homes? Don’t worry, install the latest Belkin N300 range extender for smooth and hassle-free internet access! This is an efficient networking device that is meant to extend the existing wifi signal range. Before heading towards its configuration, perform the Belkin WiFi Range Extender Installation for a superior online experience.
So, if you are interested in learning this process, start reading this guide right away!
How To Install Belkin N300 WiFi Range Extender Quickly?
Before you initiate the Belkin range extender installation, you must have a Belkin N300 extender, an existing router, an ethernet cable, a compatible computer, etc. Additionally, you must know the default wifi network name and password for wireless connectivity.
After collecting the initial requirements, you must know How To Install Belkin WiFi Range Extender in simple steps. Whether you are a new or existing Belkin extender user, these easy steps help you to seamlessly install your device at home.
Belkin WiFi Range Extender Installation Instructions
Here are the quick steps for the Belkin N300 range booster installation.
Unpacking & Placement
- Initially, unpack your Belkin N300 range booster.
- Then, take all the devices, components, and QIG out of the package.
- Now, check the functioning of all the devices and match the received items with the manual.
- After that, find a suitable location for placing your device.
- Place or mount your range extender halfway between your router and device.
- Make sure there are no metal objects, heavy furniture, mirrors, etc. interfering with wifi signals.
Wired Connections
- Now, opt for either wired or wireless setup options.
- For the wired one, connect the one end of the ethernet cable with the extender’s ethernet port and the other end to the router’s LAN port.
- Further, plug the power adapter with the extender and attach it to the wall outlet.
Wireless Connections
- Similarly, you can opt for wireless network connections.
- To do so, connect the original power adapter to the extender and then plug it into the wall socket.
- Further, open the wifi settings on your computer and find the default SSID of the Belkin extender.
- You can also find these credentials on the extender’s label or sticker.
Accessing the Setup Interface
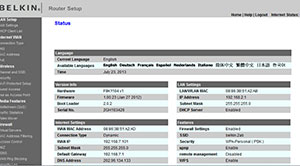
- Now, open any web browser on the computer and enter the default IP address of the Belkin extender, i.e., 192.168.2.1 or belkin.range web address.
- Hereon, log into your account using the default login credentials.
- After that, you reach the configuration page of the Belkin N300 range extender.
- Then, select your main wifi network and customize the wireless settings accordingly.
- After configuring the settings, test your extended network signals.
- Finally, the Belkin WiFi Range Extender Installation process ends here.
On the Whole
In the end, this is to say that this guide is a complete source containing the easiest steps to perform the Belkin WiFi Range Extender Installation effortlessly. In addition, you have also learned to extend the existing wifi signals within your homes.